Version Control for Scripters, Part 2
Following on from Part 1, in this post I will detail how you can make the most use of your new Version Control system.
A quick overview on how the process works is as follows:
- Git maintains a list of files that are in the repository (ie. all your scripts). Git monitors all these files and knows when they have been changed.
- Every time you change the files, you commit the changes to your local repository, along with a note saying what changes have been made. It’s best to commit your changes often, as it makes tracking changes much easier. Committing changes to the local repository can be done as frequently as you want and doesn’t require internet access.
- Whenever you are ready, you push the files from your local copy into the online repository. You have the option of doing this every time you commit, which I do, unless I don’t have internet access for some reason.
Okay, now for the more detailed steps.
Adding New Scripts
Firstly, as you’ve just cloned an empty repository, you’ll need to add your scripts to the folder.
- Copy your script(s) to the folder, using any directory structure you want. For this example, I’ve just copied one script to the folder.
- Now you’ll need to add them to the repository, so they will be monitored and can be synchronised with the online repository. Right-click on the folder and choose TortoiseGit – Add…

- TortoiseGit will helpfully list all the new files in the folder, so just tick all the scripts that you want to add.

You’ll notice in my screenshot, there is an extra file, Desktop.ini, which I never copied into this folder. This is a system file used to add an overlay to each file icon in Explorer, to show which files have been committed and which have not. This file is not one that I want to monitor and synchronise, so I add it to the end of exclude file in the .git\info sub-folder. It will then be ignored in future. - After the files have been added, you might as well commit them to the repository.
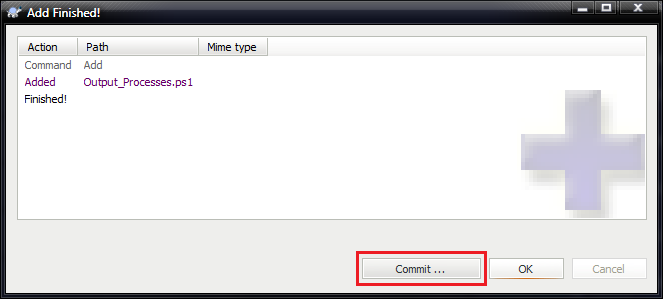
- As this is the first time you have committed any files, you will get prompted for a Name and Email. These are simply text fields that will appear with the commit message.
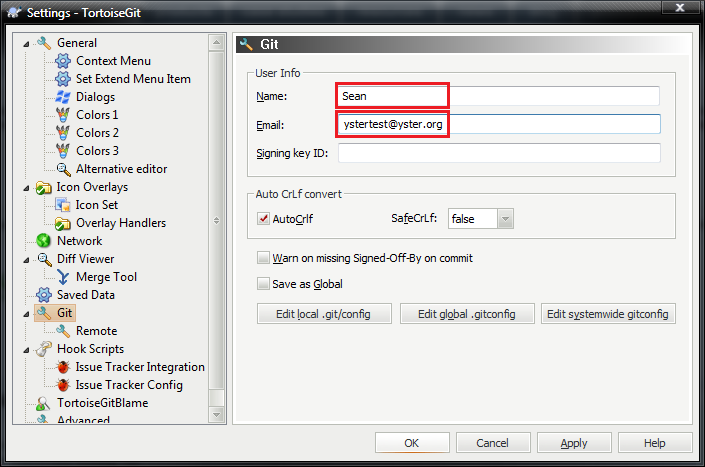
- Enter a commit message. This can be anything you like, but I try make it as descriptive as possible, because I never know when that information will come in handy.

- After committing, you have the option to Close, or Push to the online repository.
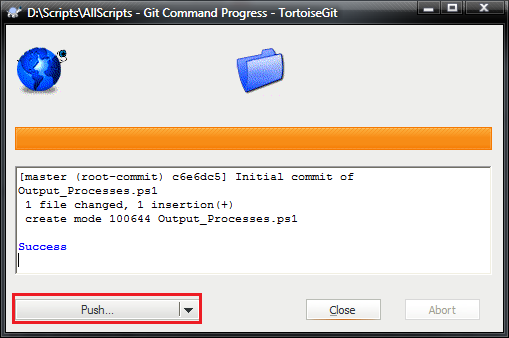
- As this is the first commit, it’s always good to get your scripts online immediately, so I choose the master repository, enter my password and after a short while, you should see a success message.
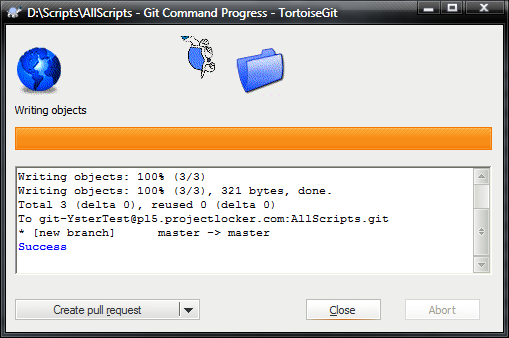
Congratulations, all your scripts are now securely backed up online.
Changing a Script
Modifying a script and then committing the changes to the repository will be the task you perform most often.
- Modify your script(s) using your favourite text editor and save it.
- If you have only modified one file, you can right-click on that file, otherwise right-click on the folder, and choose Git Commit -> “master”.
- Enter a descriptive commit message, then click OK.
- If you’re connected to the internet, click Push… to update the online repository.
Luckily the process is quick and painless, as this should ideally be done after any changes to any scripts. Unless I’ve only made a change to the comments in my scripts, I will commit the changes only after testing that any changes have worked.
Rolling Back a Change
If you discover that one of your changes has broken the script, or you want to go back to a previous version of a script, the process is just as easy.
- Find the file you want to revert, right-click it and choose TortoiseGit – Show Log.
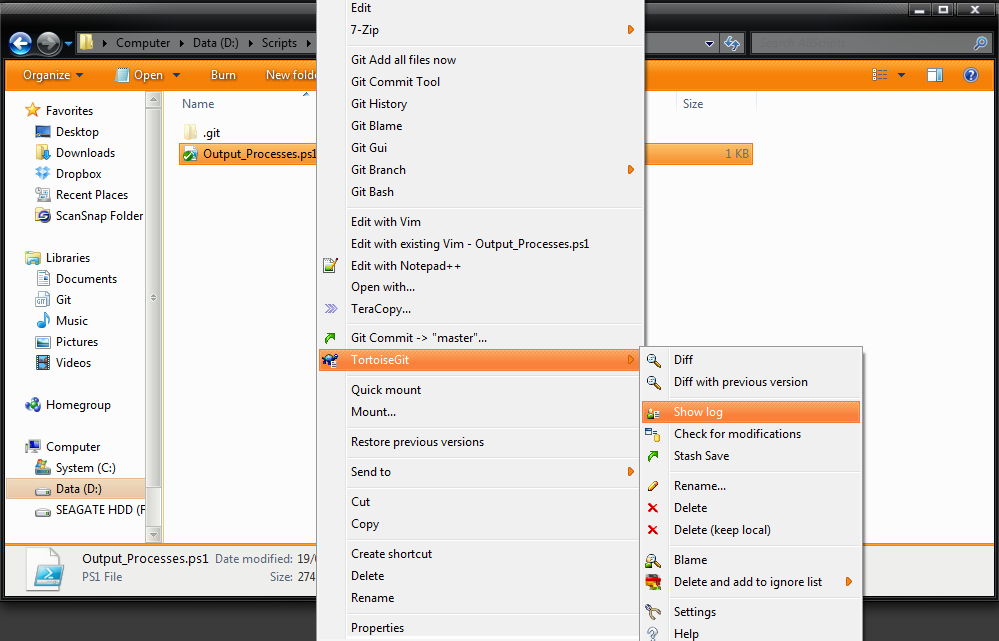
- In the list of revisions, you can see all the commit messages alongside the dates and times they were changed.
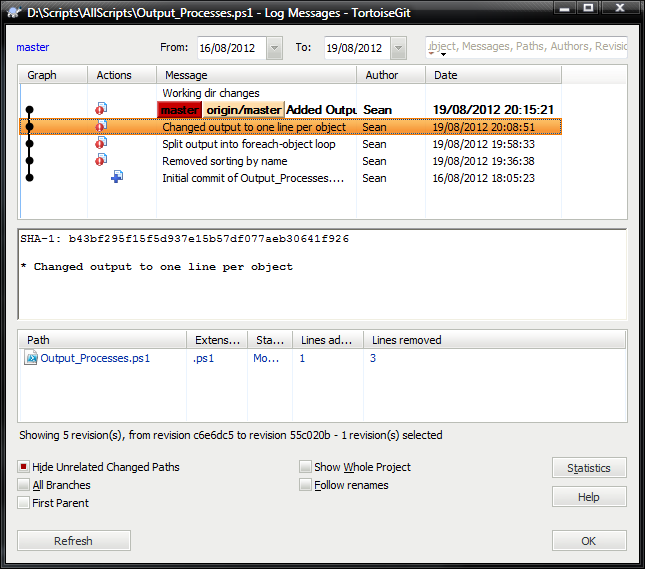
- In the case of simply reverting the last change, right-click on the revision and choose Revert change by this commit
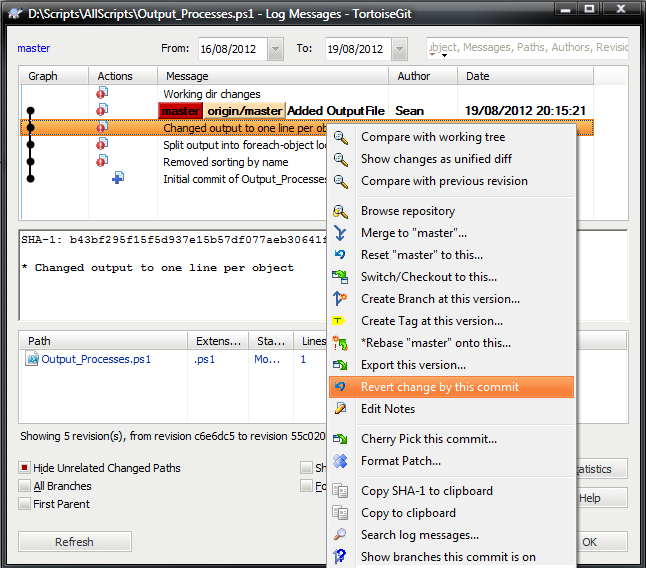
- If you are trying to revert just one earlier change, follow the same procedure as above. However the specific changes between the selected version and the current version will be marked in the file and you’ll need to edit the file first and resolve the change(s) to the file. The changes are clearly marked.
- If you want to revert all changes up to a certain point, it’s easier to choose the option Reset “master” to this…
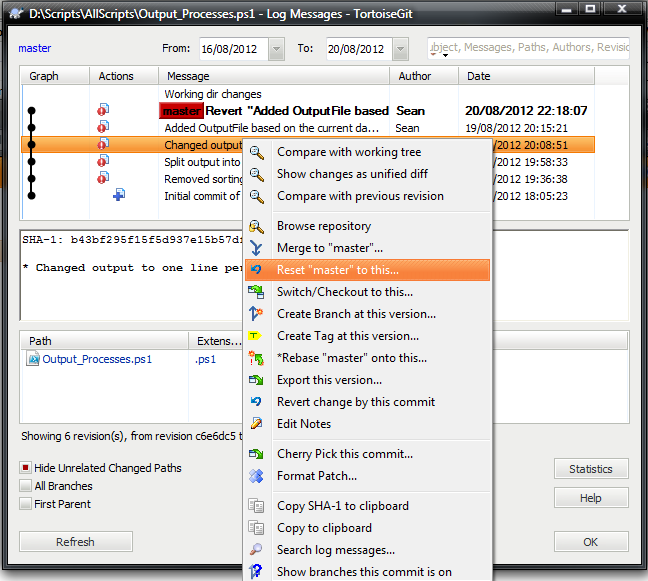
- Additionally, if the commit messages are not sufficient to see what changes were made, you can compare the differences by choosing the option Compare with working tree. A diff output showing the differences will be displayed and you can confirm that the changes are the ones you want to revert.
Of course, after reverting any changes, you will need to Git Commit again and push your changes back to the online repository. Don’t worry, even the reversions are all logged and you can go back to any previous versions, or compare them and revert specific changes.
Leave a Reply