MDT 2013 Guide 12: Deployment Role and Computer Object
This post will detail the final steps required for the deployment.
Since this phase will add the computer to the domain, we will require a user with specific permissions to add workstations to the domain.
Create Domain Join User
On the domain controller, open Active Directory Users and Computers.
If you don’t already have one, create an OU for your new workstations.
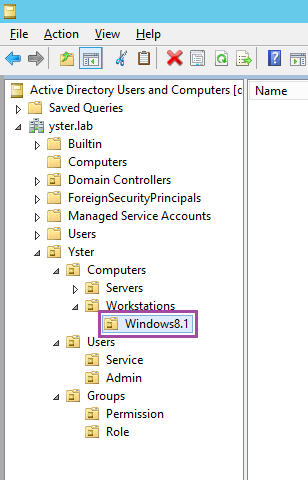
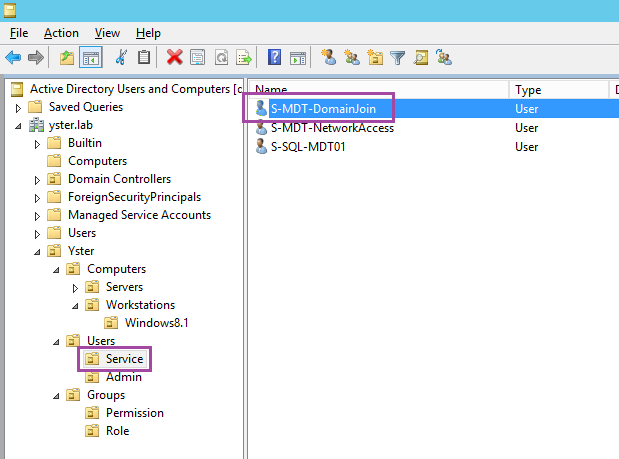
Next create a new Service User which will be used by MDT to add workstations when deploying.
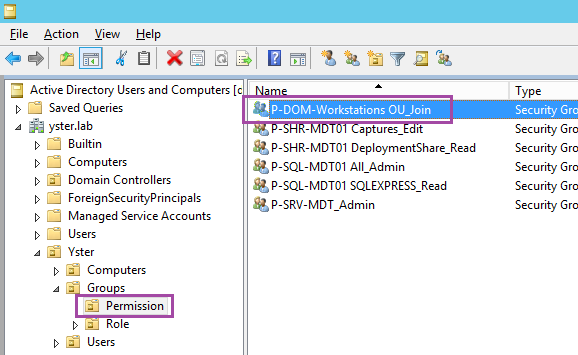
Create a new Permissions Group which will be given the permissions to add workstations.
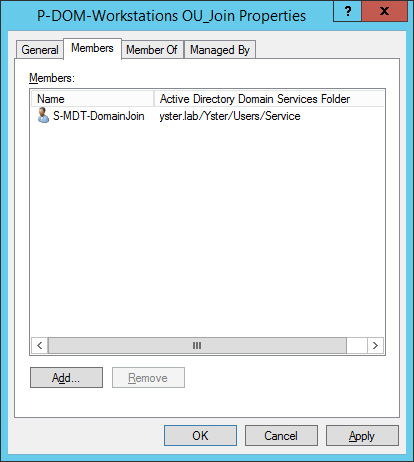
Add the service user to the above permissions group.
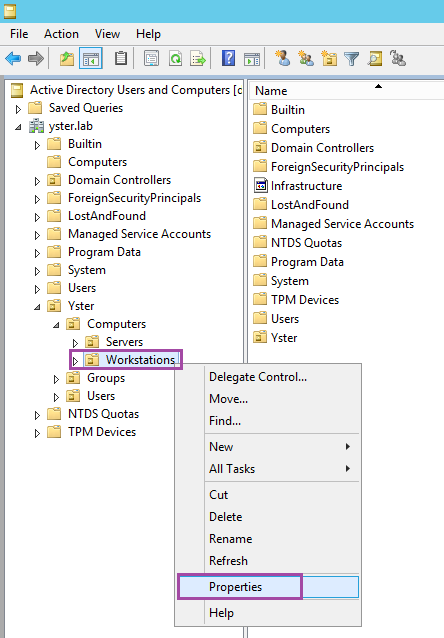
In order to add the relevant permissions, we will need to enable Advanced Features within Active Directory Users and Computers. Click the View menu and Advanced Features.

Navigate to your Workstations OU, right-click and choose Properties.
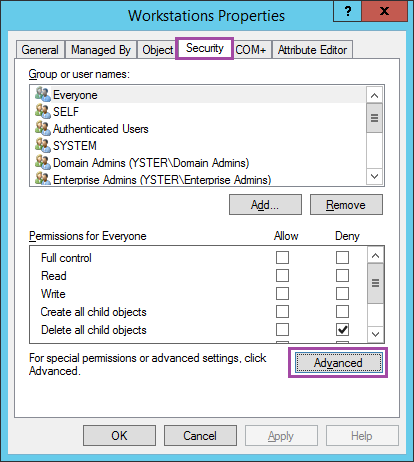
Click on the Security tab and then Advanced.
Click Add, then Select a principal. Type in the name of the permissions group and click Check Names.
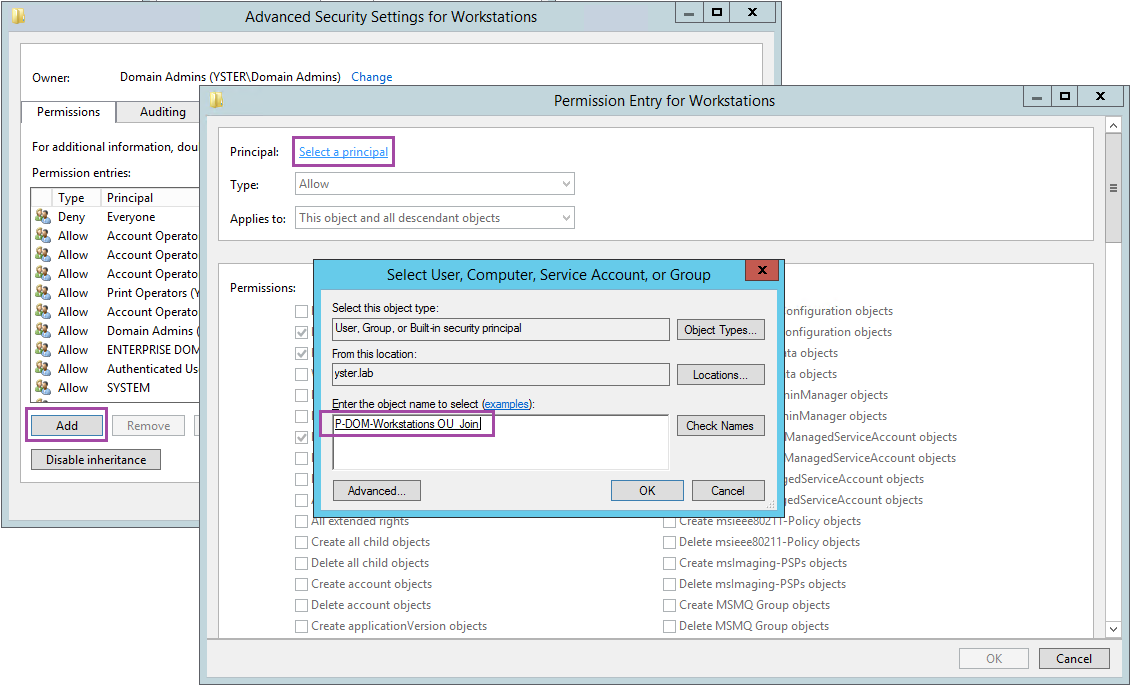
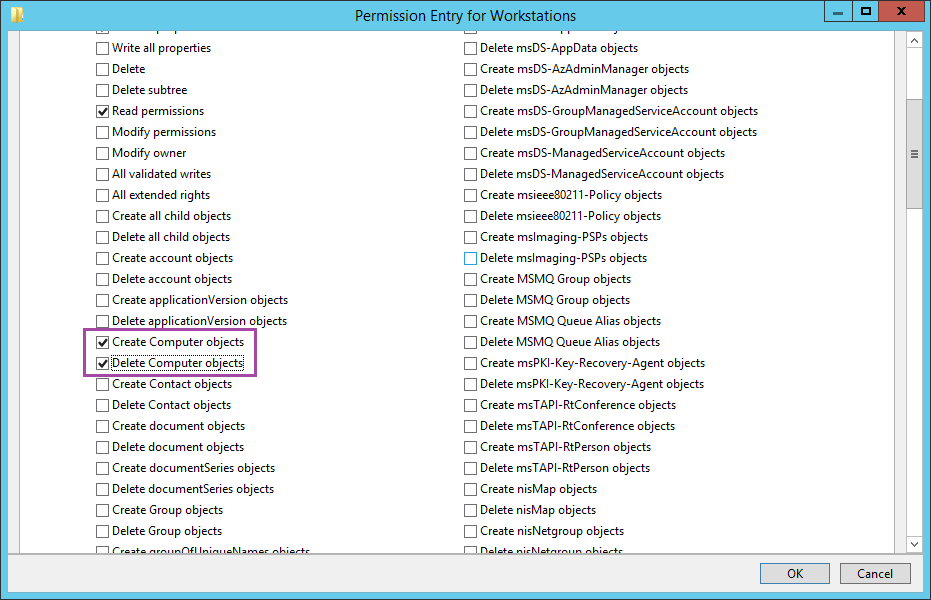
After clicking OK, scroll down and tick Create Computer objects and Delete Computer objects.
Click OK to save.
Click Add again and Select a principal. Enter the same permissions group as before and click OK.
Change Applies to to Descendent Computer objects.
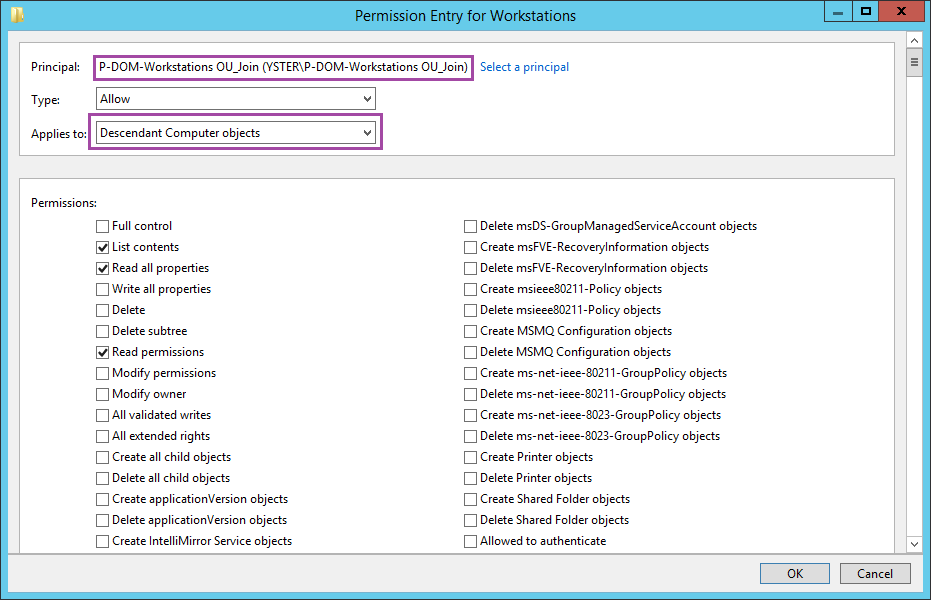
Scroll down and tick all of the following Permissions:
- Write all properties
- Modify permissions
- Change password
- Reset password
- Validated write to DNS host name
- Validated write to service principal name
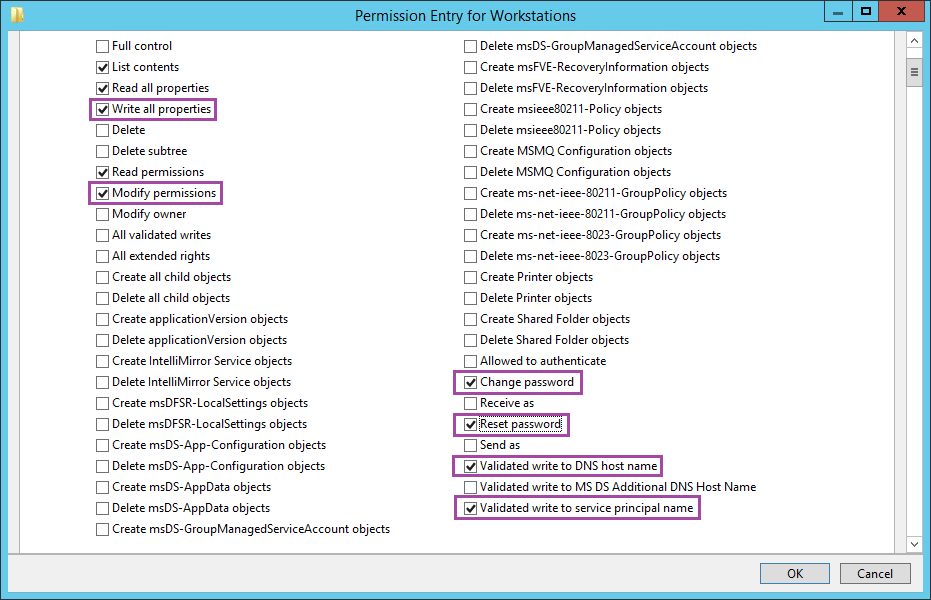
Click OK a few times to save all permissions
Deployment Role
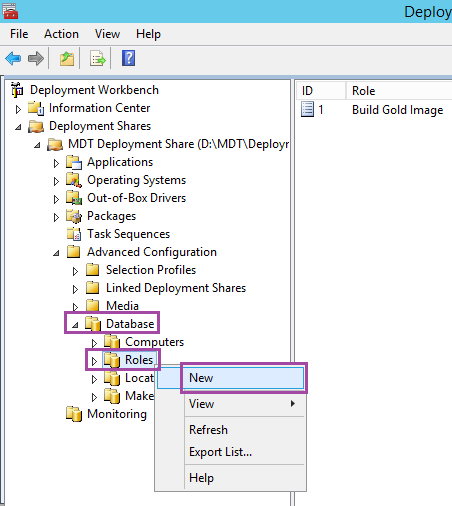
On the MDT server, open Deployment Workbench and navigate to Advanced Configuration – Database – Roles. Right-click on Roles and choose New.
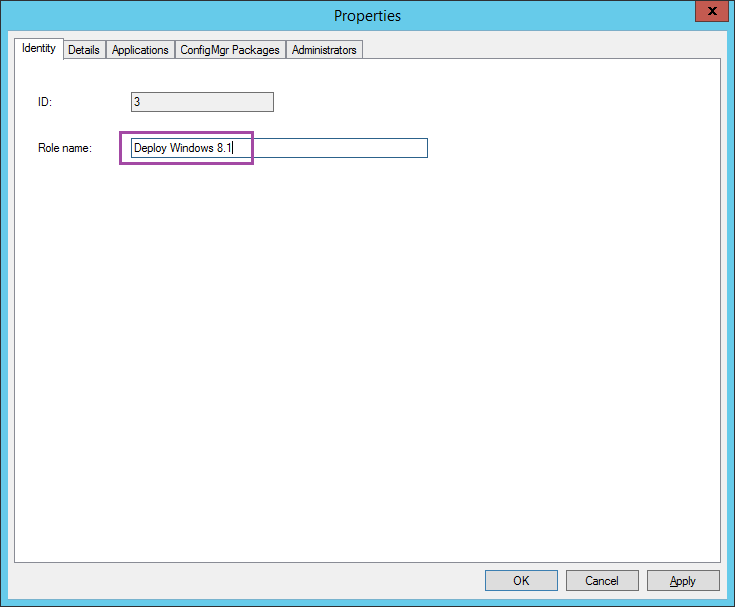
Give the role a name.
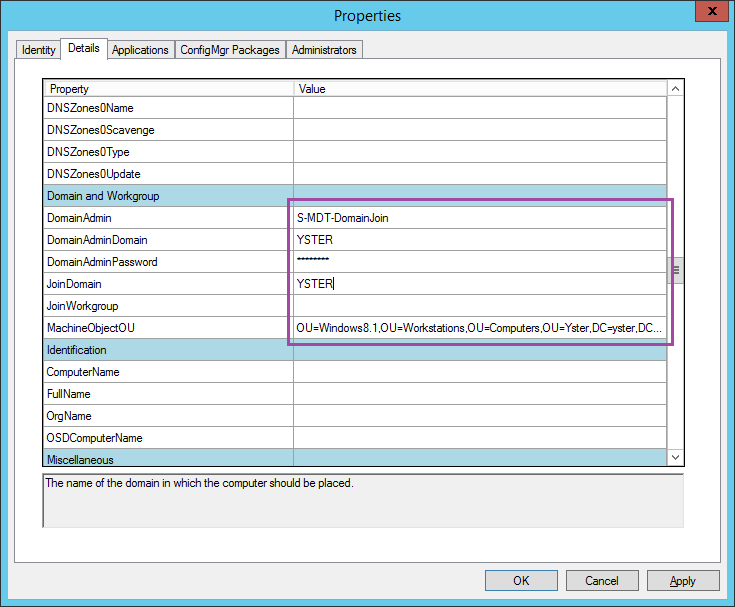
Click on the Details tab and modify the following:
- DomainAdmin: Enter the DomainJoin service user you have just created (eg. S-MDT-DomainJoin)
- DomainAdminDomain: Your domain name (eg. YSTER)
- DomainAdminPassword: The password for the service account
- JoinDomain: The domain again (eg. YSTER)
- MachineObjectOU: The distinguished name of your workstations OU
Note: If you are not familiar with how distinguished names are specified, you can copy and paste the information from Active Directory Users and Computers. Right-click on the OU in question and choose Properties. Click on the Attribute Editor tab, select distinguishedName and click View.

From there you can copy the value and paste it into the MachineObjectOU field in the MDT Role.
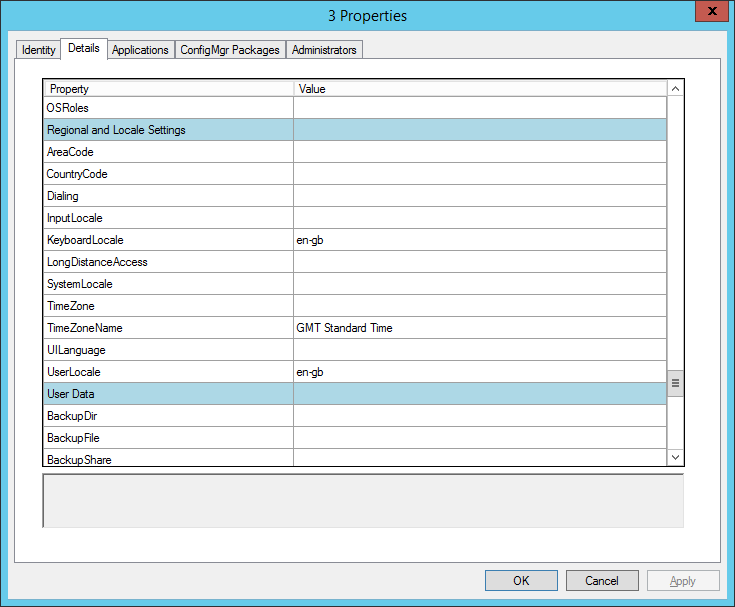
Back in the MDT Role, you’ll want to continue editing the following entries:
- _SMSTSORGNAME: This string will appear on the top of the status window when deploying, so I like to add something like “Deploying Windows 8.1”
- TaskSequenceID: Enter the ID of your deploy task sequence (eg. DEPLOY_WIN81)
- WsusServer: Enter the URL to your WSUS server (eg. http://mdt01.yster.lab:8530)
- TimeZoneName: The name of your time zone (eg. GMT Standard Time)
- KeyboardLocale: If you don’t use a standard US keyboard, enter the locale here (eg. en-gb)
- UserLocale: Enter a user locale if not US standard (eg. en-gb)
Click OK to save the Role.
Add the Computer Object
Create a new virtual machine and get the MAC address. Same procedure as with the Gold Image virtual machine.
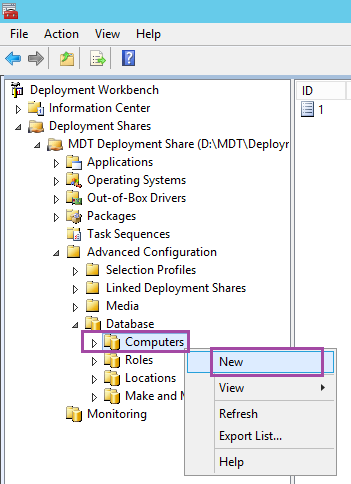
Navigate to Advanced Configuration – Database – Computers. Right-click and choose New.
Add the MAC Address for the new virtual machine, and a Description if you want.
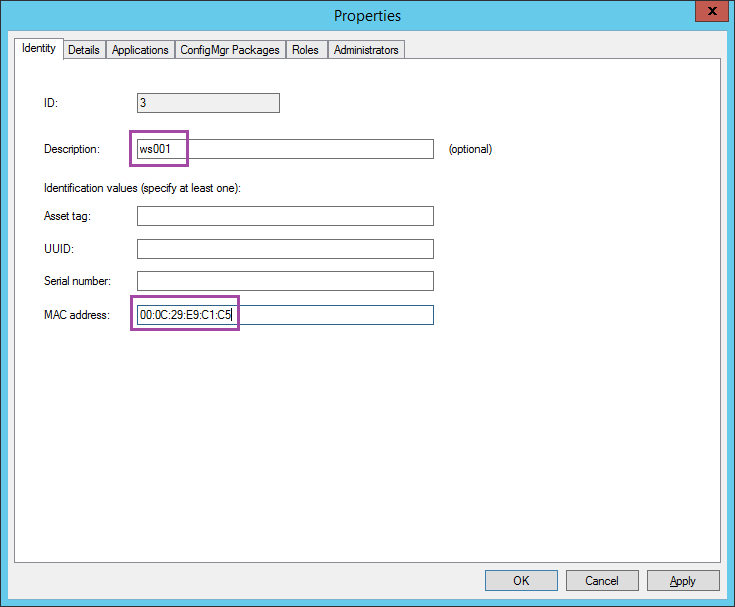
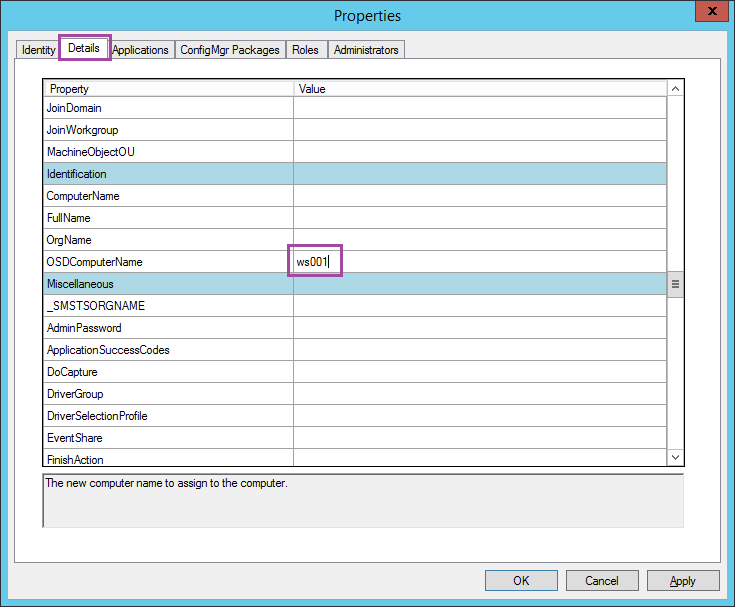
Click on the Details tab and enter the computer name under OSDComputerName.
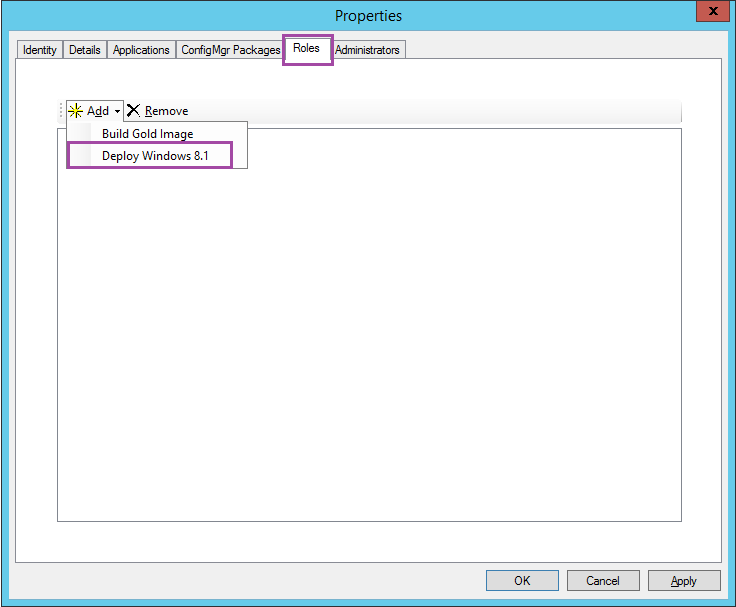
Click on the Roles tab and Add the Deploy Windows 8.1 role.
Click OK to save.
Deploying a Workstation
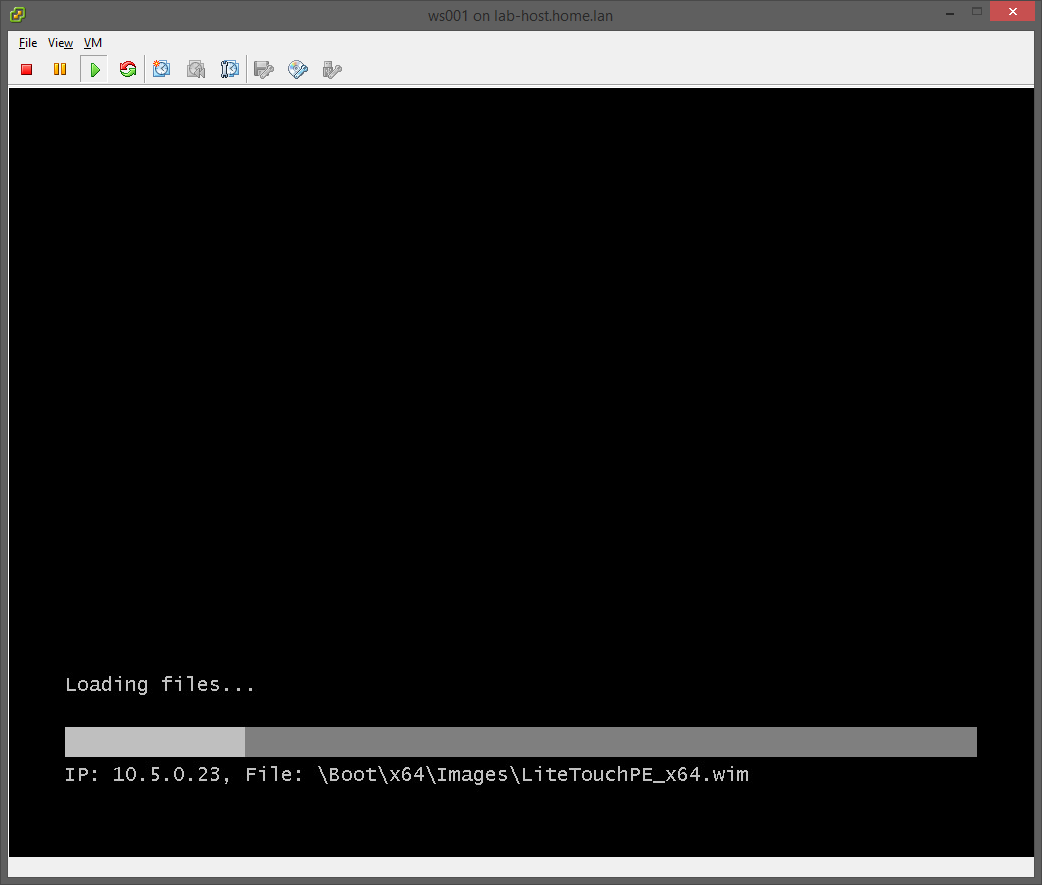
The last step in the process is to network boot the new virtual machine and watch while it deploys.
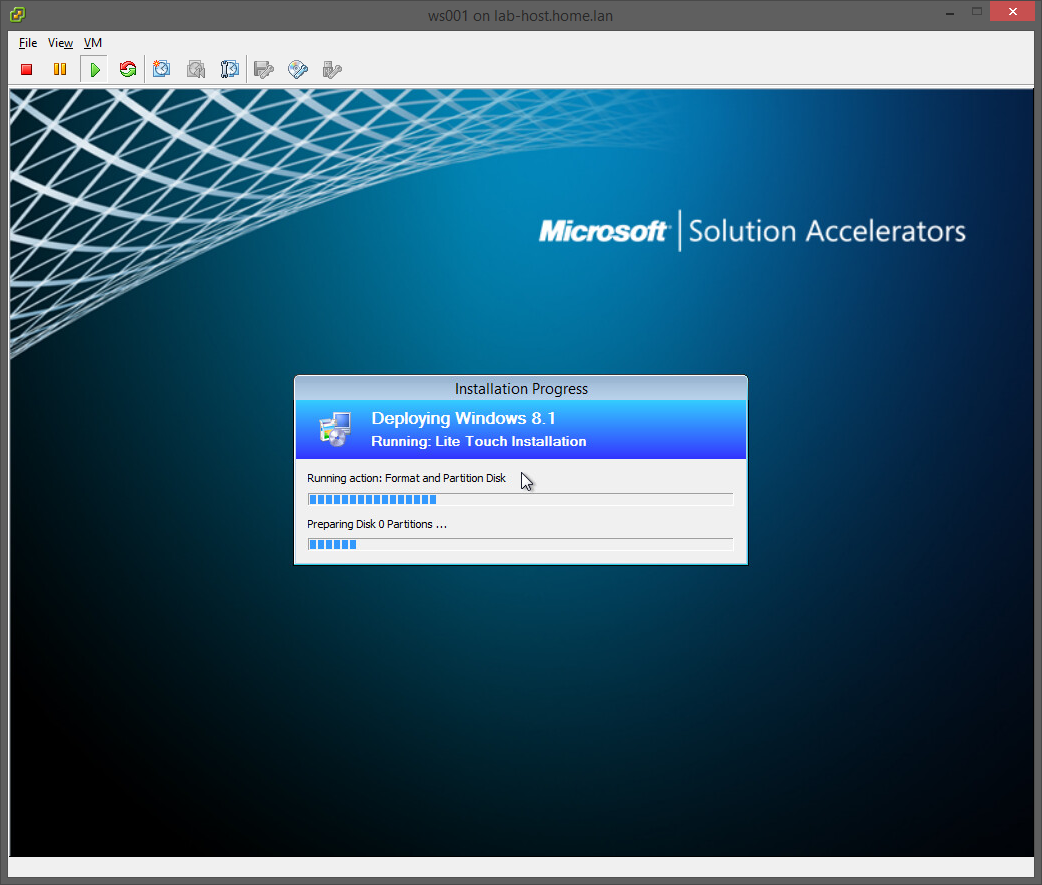
After a few minutes, it will complete. Log in with a domain user and you will see that it is joined to the domain.
Conclusion
This concludes phase 3 and the MDT 2013 Guide. You should now have a complete deployment framework that can be customised for your specific needs.
MDT2013 Series:
01 Intro and Active Directory Setup
02 MDT Software Installation
03 Deployment Share and MDT Database Setup
04 Network Access Permissions
05 Application and OS
06 Creating Build Task Sequence
07 MDT Database
08 WDS and PXE Booting
09 Creating the Gold Image
10 Capturing the Gold Image
11 Creating Deployment Task Sequence
12 Deployment Role and Computer Object
Sean, every single computer do i have to image, i’ll need to input its mac adress into DB before apply the imaging?
Yes, you need to enter the MAC and name of the computer.
This is to make re-imaging easier, and to prevent machines not in the DB from being imaged by mistake.
Can i protect my deploy with password to avoid this input (Mac Adress) or another way?
Yes you can, but the point of my guide is to automate everything that I can. It is designed so that I do all the configuration on the server, and then you don’t need to do anything on the workstation.
If you want to set up a password and enter details manually, you should follow a different guide that shows you how to do that. This is a good article from Microsoft.
Thanks for the fast reply Sean, I said that because my client wants a fully automated deployment, if i say that him needs to input previously the mac address maybe i have a problem.
I can use your guide, i only need to insert all of my clients (about 2000 clients) using an insert command into MDT DB.
Sorry for my bad english, i’m learning together with MDT =)