MDT 2013 Guide 04: Network Access Permissions
This post will deal with giving access to the Deployment Share and MDT database. We will limit access to all deployment resources, granting only the minimum rights needed to perform the deployment.
Active Directory Users and Groups
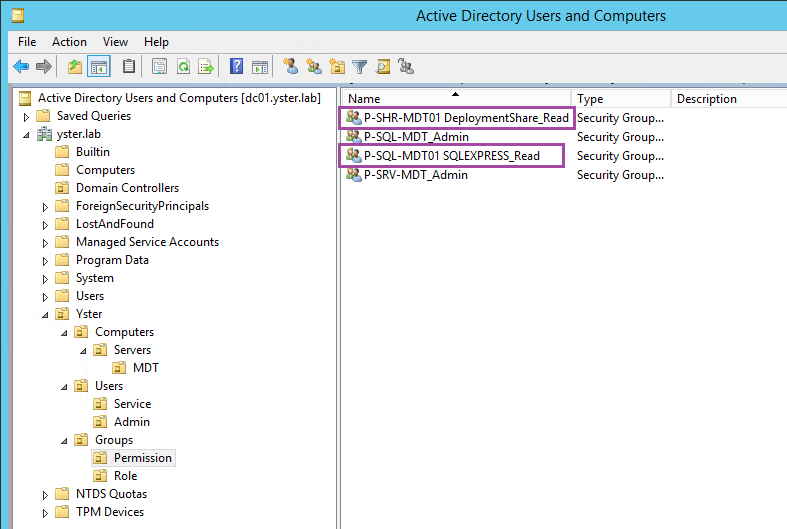
On the domain controller, open up Active Directory Users and Computers.
Create a new Service user, which will be used by the task sequences to access the Deployment Share. Remember, when first deploying a PC, it is not on the domain, so will need domain credentials in order to access the Deployment Share. In my lab, I created the user S-MDT-NetworkAccess.

Continuing with the Role Based Access Control theme, create two Permission groups:
- Permissions to the DeploymentShare$ share. To improve security, we will only allow the above service account read access the Deployment Share.
- Permissions to the MDT SQL Database. As with the share permissions, the service account will only have read access to the MDT database.
Add the S-MDT-NetworkAccess user to both of the above groups.
MDT Database Configuration
Log back onto the MDT server to continue. The next step will be to configure access rights on the MDT database.
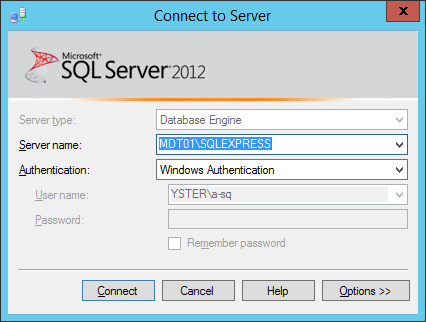
Open SQL Server Management Studio. By default it should have the correct instance and authentication selected. If not, change it to match the info below and click Connect.
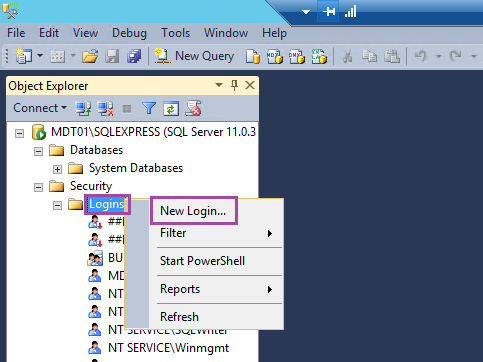
Open Security, right-click on Logins and choose New Login…
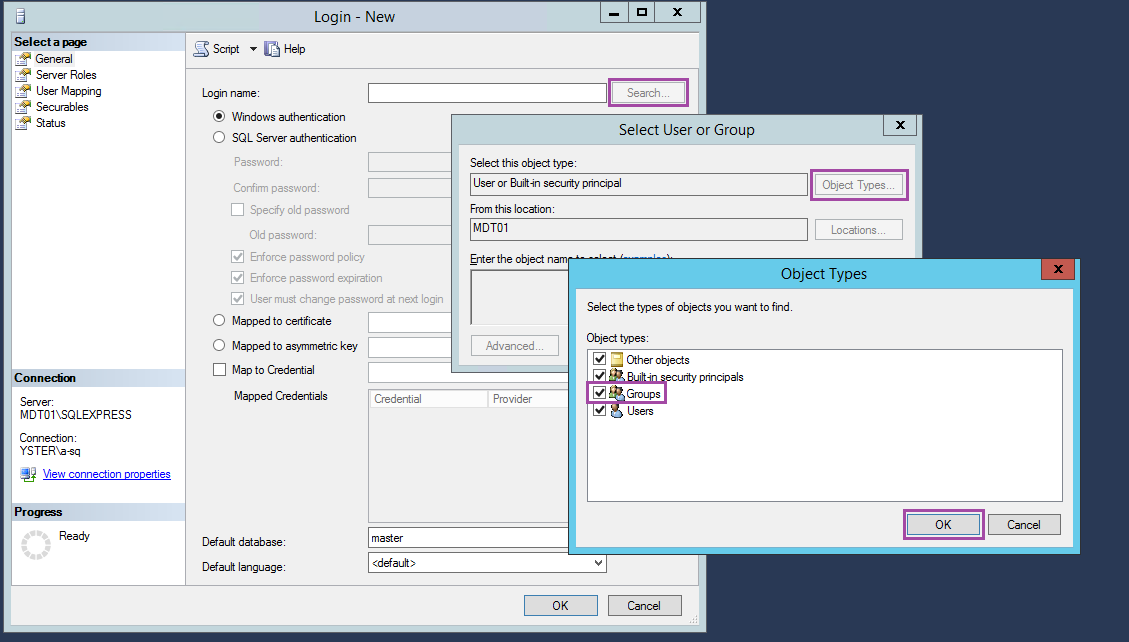
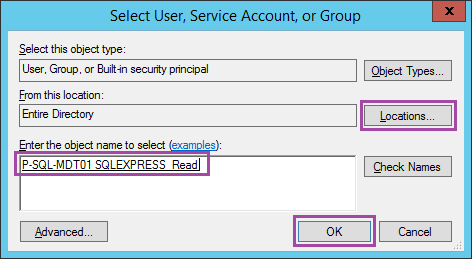
Click the Search… button, then Object Types… and tick Groups before clicking OK.
Click Locations… and choose Entire Directory, then type in the name of the SQL Permissions group created earlier. Click OK to continue.
Select User Mapping on the left. Tick the box next to the MDT database and then tick db_datareader in the bottom pane.
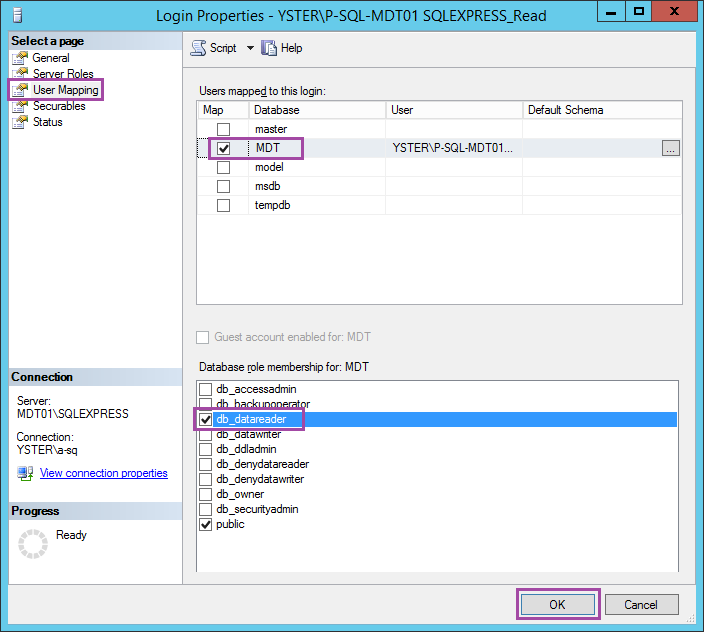
Click OK to save the permissions.
Deployment Share Permissions
Next we’ll restrict file permissions on the Deployment Share to allow the Network Access user account only read permissions. By default, it has read/write permissions.
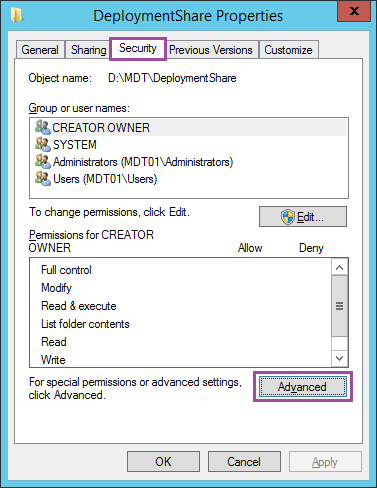
Open Explorer and browse to D:\MDT. Right-click on the DeploymentShare folder and choose Properties.

Click Security and then Advanced.
Click on Change Permissions and then Disable Inheritance. Choose the option to Convert inherited permissions into explicit permissions on this object.
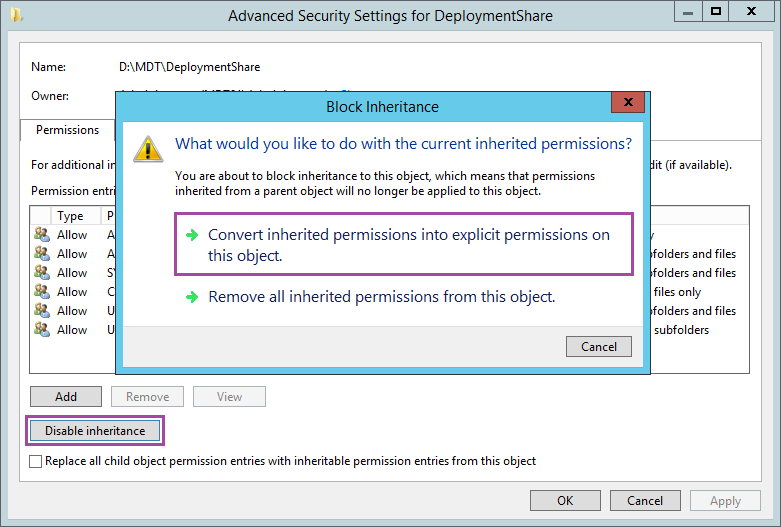
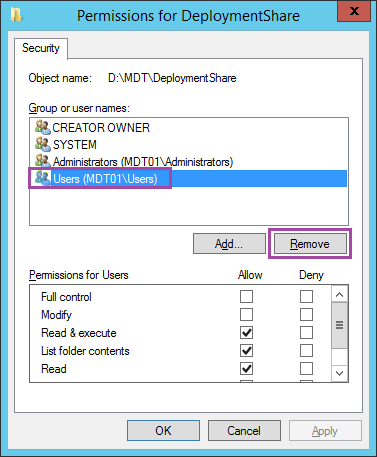
Click OK to save this change. Back at the original Security tab, click Edit. Select the Users group and Remove it.
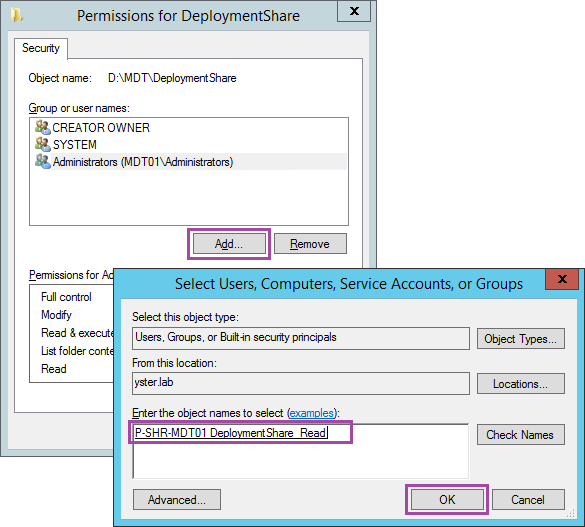
Click Add…, type in the name of the share group you created earlier and then click OK. Click OK twice more to save the permissions on the DeploymentShare folder.
Set up Captures Share
The final thing we need when capturing the gold image is a place to store that image.
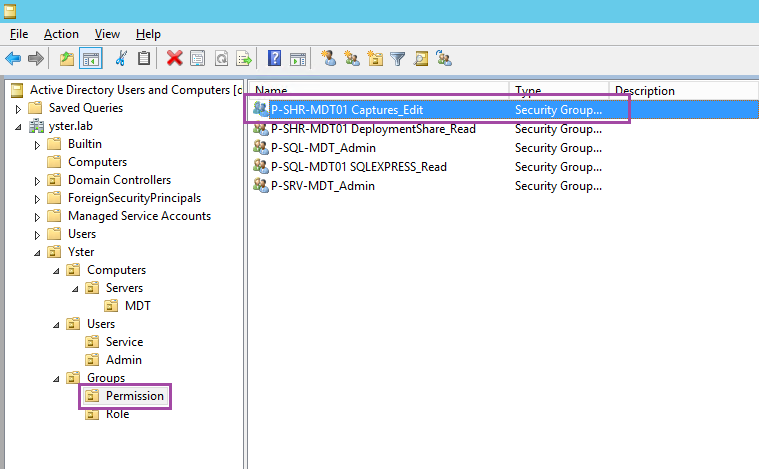
Following our Role Based Access Control model, we create an active directory permissions group for edit (write) access to the Captures folder.
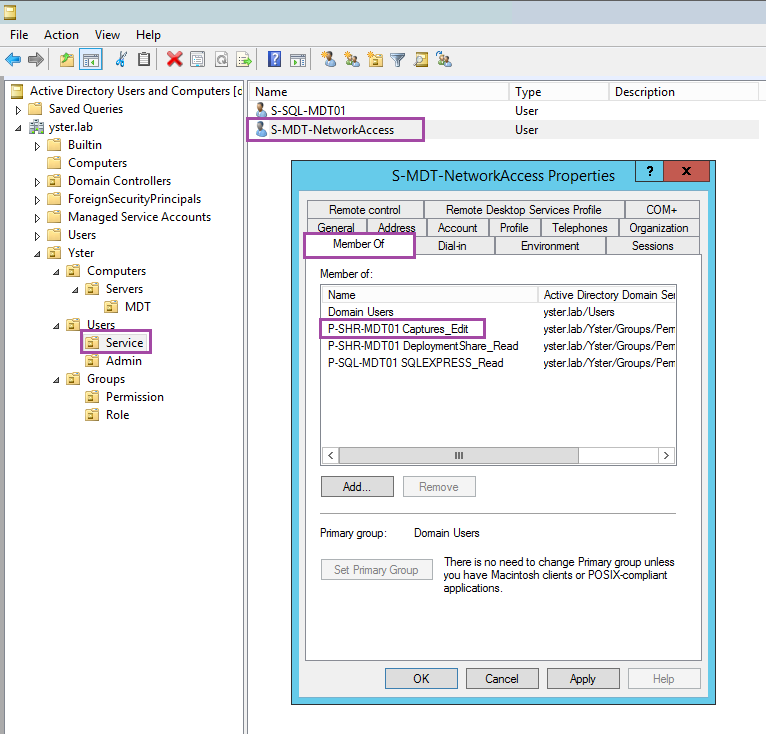
Go to the Properties of the S-MDT-NetworkAccess service user and add it to the new permissions group.
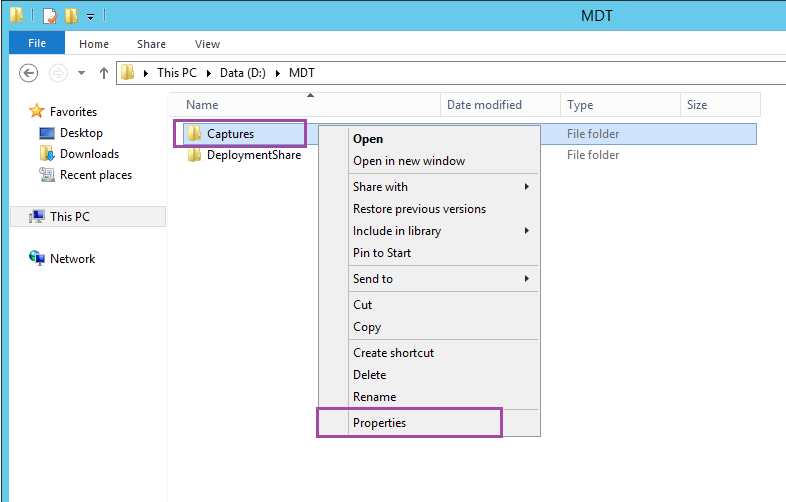
On the MDT server, browse to the MDT folder (eg. D:\MDT). Create a new folder called Captures and go to Properties.
Go to the Sharing tab and click on Advanced Sharing…
Tick the box to Share this folder. Change the share name to Captures$ and click Permissions.
Tick the Full Control box.

Click OK twice to get back to the Properties page. Go to the Security tab.
Just like we did for the DeploymentShare folder, disable inheritence and remove the Users group from the list of permissions. Add the Captures permissions group and give it Modify access.
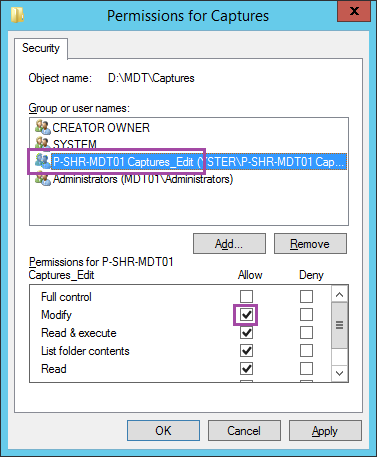
Click OK a few times to save all the changes.
Adding User to Bootstrap
Lastly, we need to instruct the deployment process to use the above user account to access the Deployment Share.
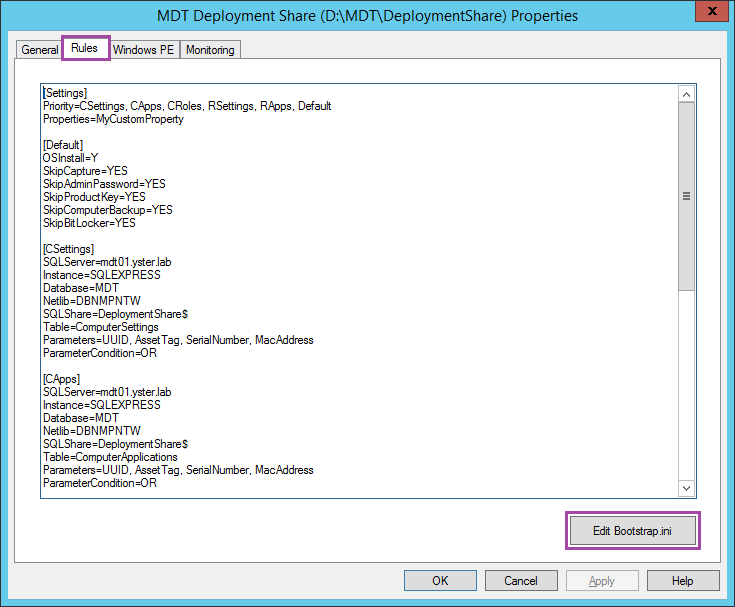
Open Deployment Workbench, right-click on MDT Deployment Share and choose Properties.
Click on the Rules tab and then Edit Bootstrap.ini.
Add the 3 highlighted lines under DeployRoot. Bootstrap.ini is added to the PXE boot image so these lines tell the deployment agent what share to connect to and what credentials to use.
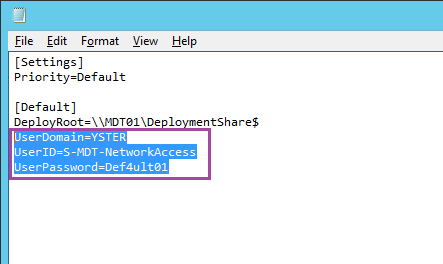
Save and Close the file, then click OK.
Conclusion
Security restrictions on the Deployment Shares and the MDT database are now complete. The next post will outline the deployment methodology and import applications and OS files.
MDT2013 Series:
01 Intro and Active Directory Setup
02 MDT Software Installation
03 Deployment Share and MDT Database Setup
04 Network Access Permissions
05 Application and OS
06 Creating Build Task Sequence
07 MDT Database
08 WDS and PXE Booting
09 Creating the Gold Image
10 Capturing the Gold Image
11 Creating Deployment Task Sequence
12 Deployment Role and Computer Object
Leave a Reply