MDT 2013 Guide 02: MDT Software Installation
This post will detail the installation of MDT itself and the prerequisite software required to implement it.
Log onto the MDT server to perform the rest of the steps.
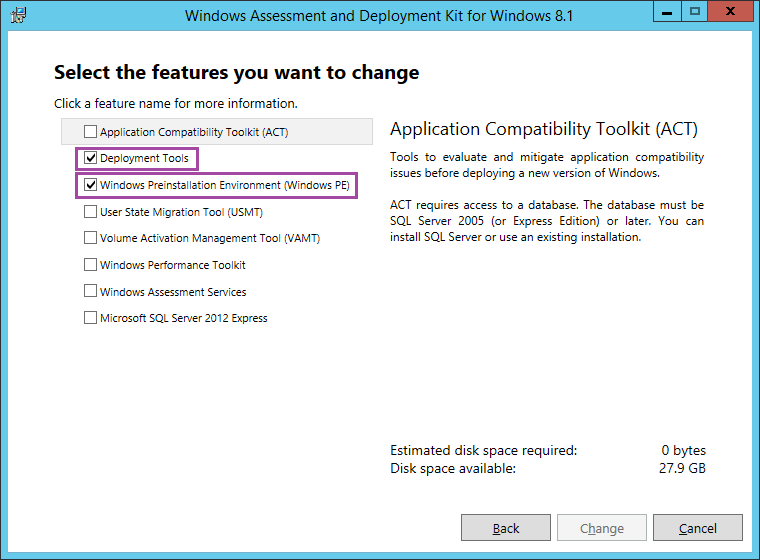
Windows Assessment and Deployment Kit (ADK)
Run the setup file. Choose defaults for all the answers, apart from the features to install. Select only Deployment Tools and Windows Preinstallation Environment (Windows PE).
Microsoft Deployment Toolkit 2013
Run the setup and select defaults for everything. There is almost nothing to configure.
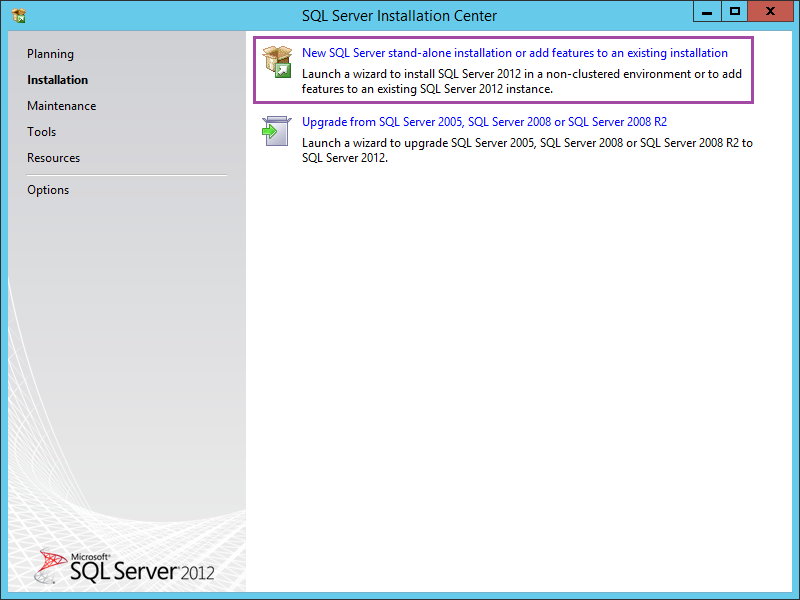
Microsoft SQL Server 2012 Express
Start the installation and choose New SQL Server stand-alone installation.
After you’ve accepted the license agreement, setup will most likely pick up a few Product Updates. Click Next to download them. The next step is Feature Selection. Select only the options listed below. I also change the shared feature directories to the D: drive of my server, but that’s not essential.

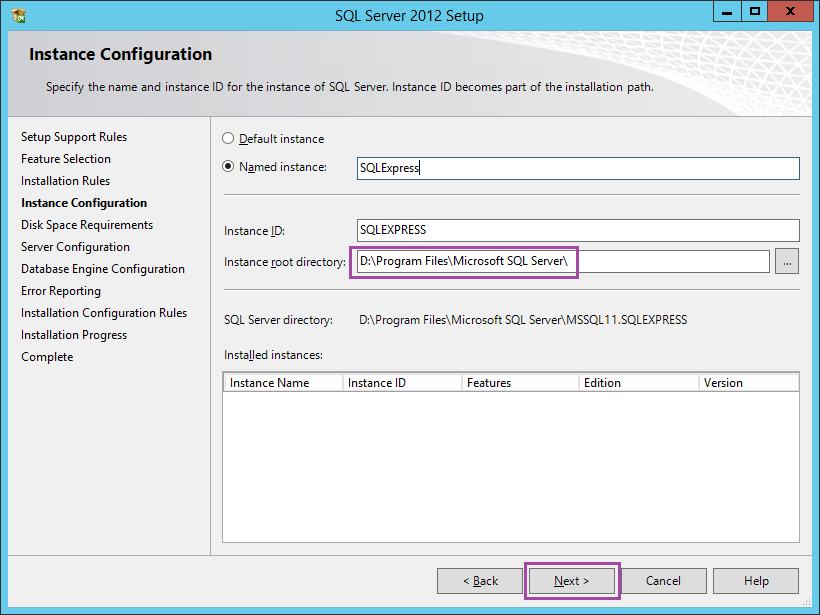
On the Instance Configuration page, I change the Instance root directory to the D: drive as well.
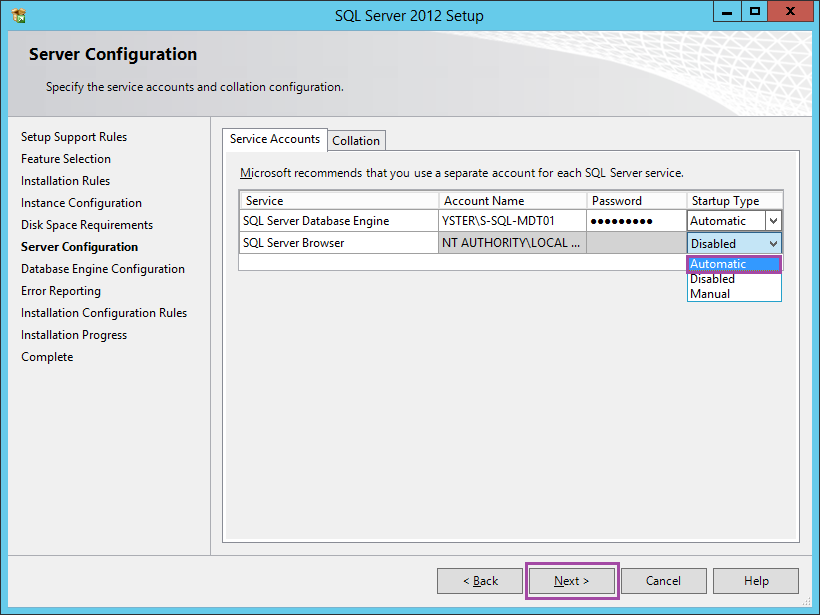
On the Server Configuration page, click the down arrow on the SQL Server Database Engine line and choose Browse…Select the SQL service account you created earlier and enter the password.
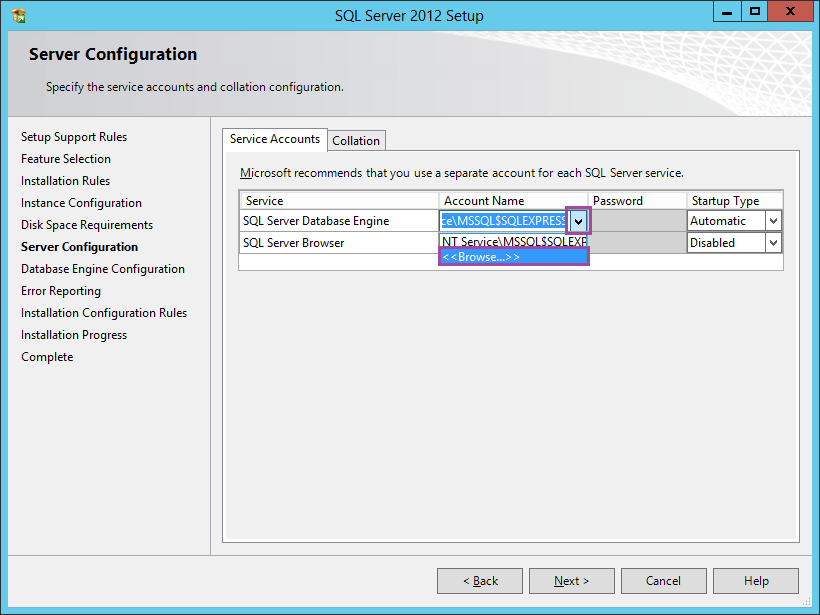
Set the SQL Server Browser service to Automatic.
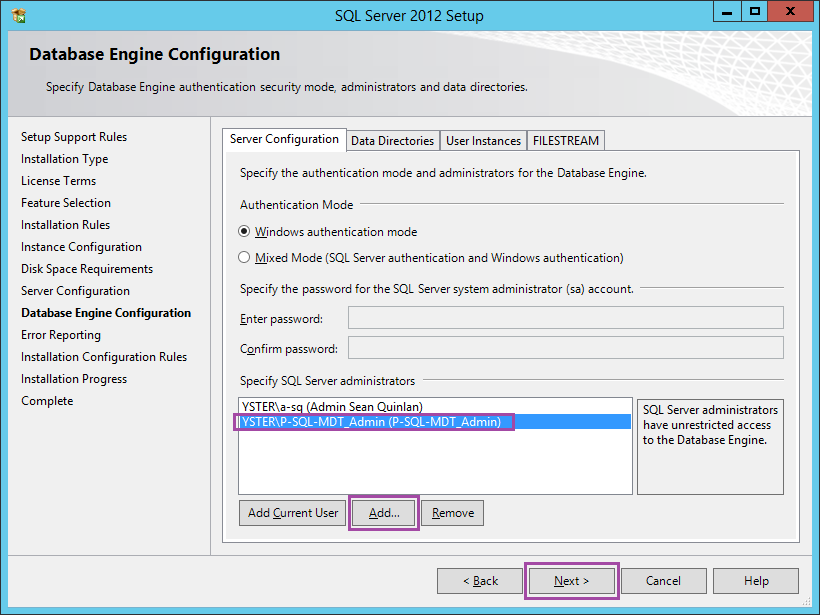
At the Database Engine Configuration page, click Add… and choose the Permission group for SQL Admins you created earlier.
Click Next on the Error Reporting page to start the installation. Wait for it to complete.
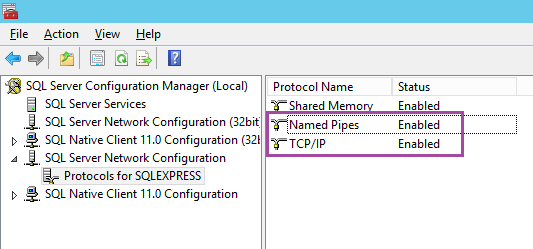
Open SQL Server Configuration Manager and browse to SQL Server Network Configuration – Protocols for SQLEXPRESS. Enable Named Pipes and TCP/IP by double-clicking on each one and changing Enabled to Yes.
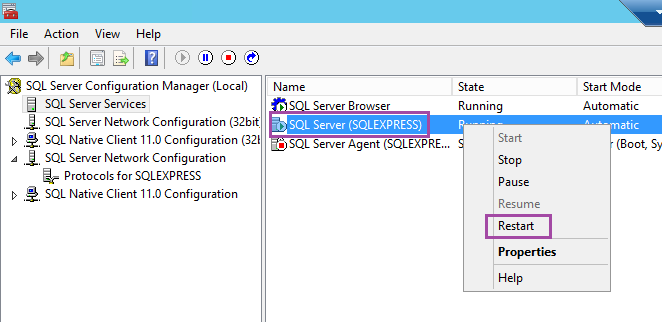
Click on SQL Server Services. Right-click on SQL Server (SQLEXPRESS) and choose Restart.
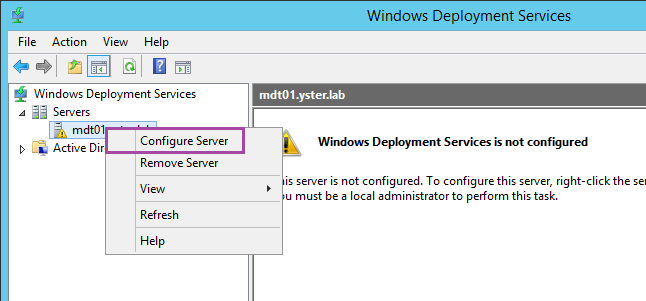
Windows Deployment Services (WDS)
Note: WDS needs to be authorised in Active Directory, so the configuration needs to be performed with an account that has Domain Admin rights.
Install the Windows Deployment Services role from Server Manager.
After installation, open the WDS console. Right-click on the server and choose Configure Server.
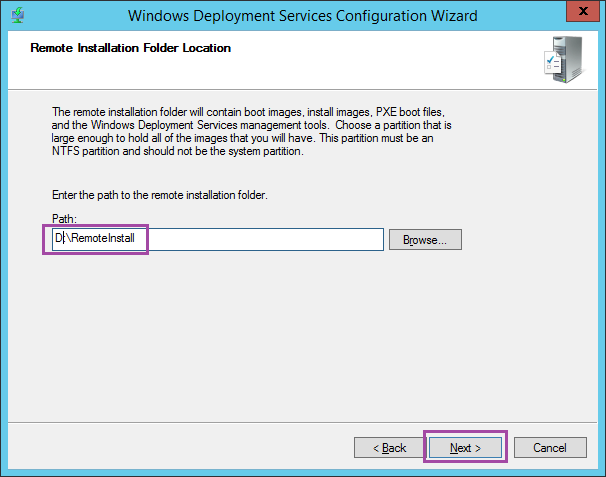
Choose Integrated with Active Directory and click Next. I change the path of the remote installation folder to the D: drive, but this can be left on the C: drive if needed. Click Next to continue. If you left the installation path on the C: drive, you will get a warning message, but this can be ignored.
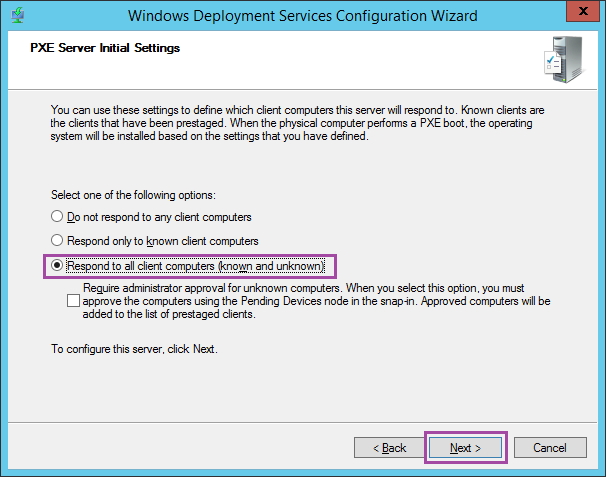
Choose Respond to all client computers (known and unknown). We will only be using the PXE boot functionality from WDS, not the rest of the deployment services. Therefore, none of the computers we will build will be staged in Active Directory or known to WDS.
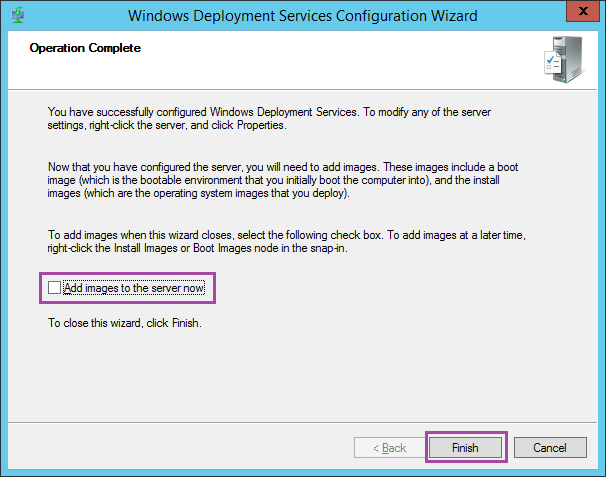
Untick Add images to server now and click Finish to complete.
Right-click on the server again and choose Properties.
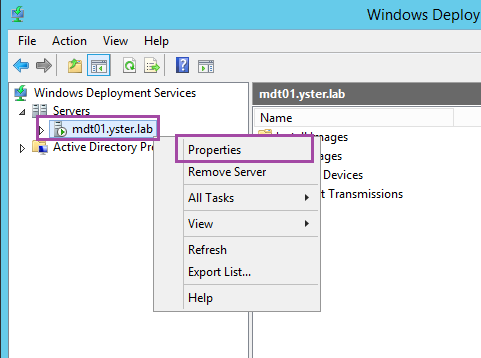
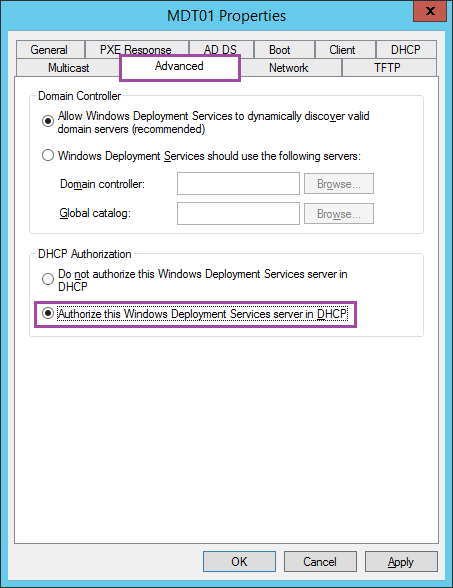
Click on the Advanced tab and choose Authorize this Windows Deployment Services server in DHCP.
Windows Server Update Services (WSUS)
Install the Windows Server Update Services role from Server Manager. The defaults are fine for all the configuration questions.
After the installation has completed, go to Notifications in Server Manager and launch the post-installation tasks and wait for them to complete.
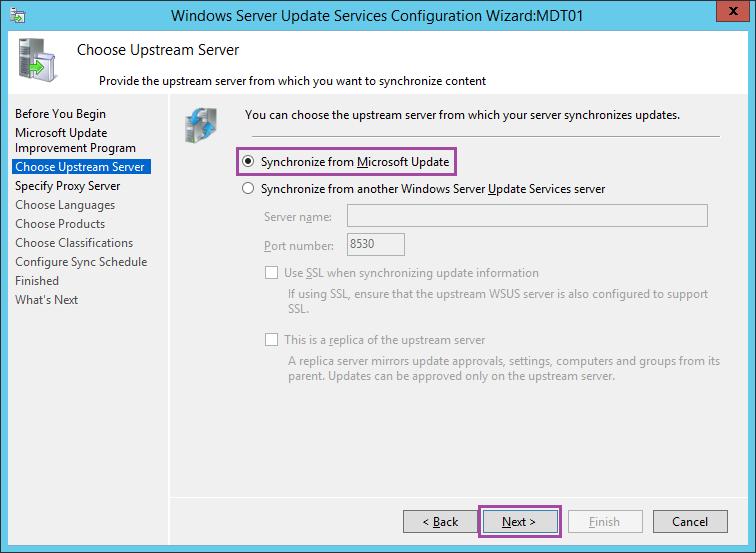
Open the WSUS Console. The Configuration Wizard will be launched automatically. When prompted, leave the Upstream Server on Synchronize from Microsoft Update.
Click on Start Connecting when prompted. Click Next when it finishes.
Choose your Language.
On the Choose Products page, select all the products you want to download updates for. Since I only intend to deploy Windows 8.1 and Office 2013 in my home lab, select only the following entries:
- Office 2013
- Windows 8.1
- Windows Defender
- Windows Server 2012 R2
Select the relevant entries for your network.
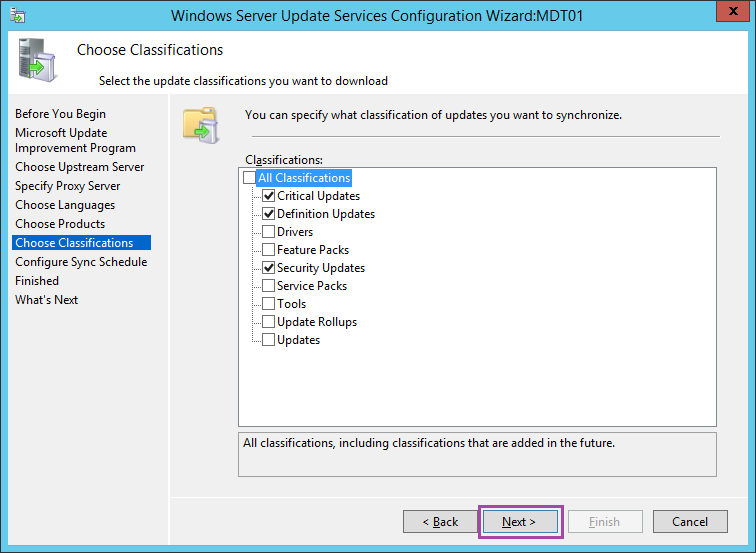
Leave Classifications on the defaults.
If you want to Synchronize automatically, set up a time and frequency. I find once a day is frequent enough, especially in a lab.

Tick Begin initial synchronization and then Finish.
The progress of the initial synchronisation can be monitored from Synchronizations in the WSUS Console. Wait until that synchronisation has completed before continuing.
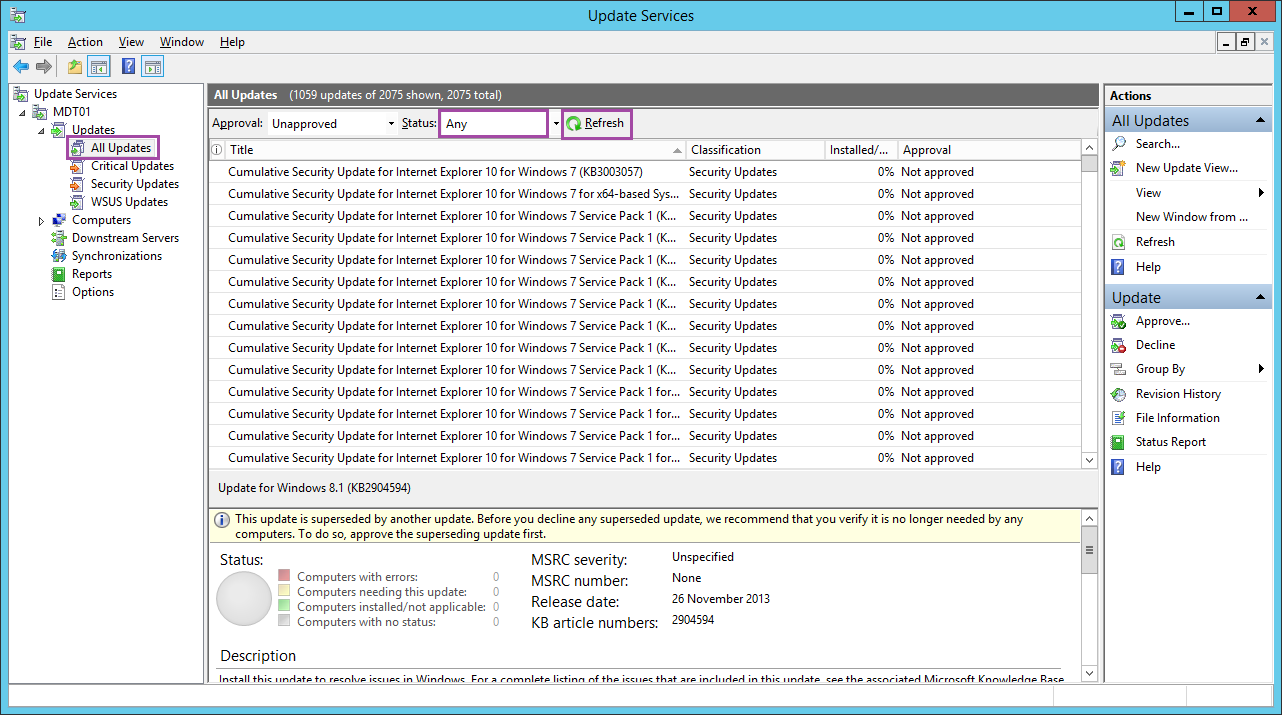
Go to Updates – All Updates. Change Status to Any and click Refresh.
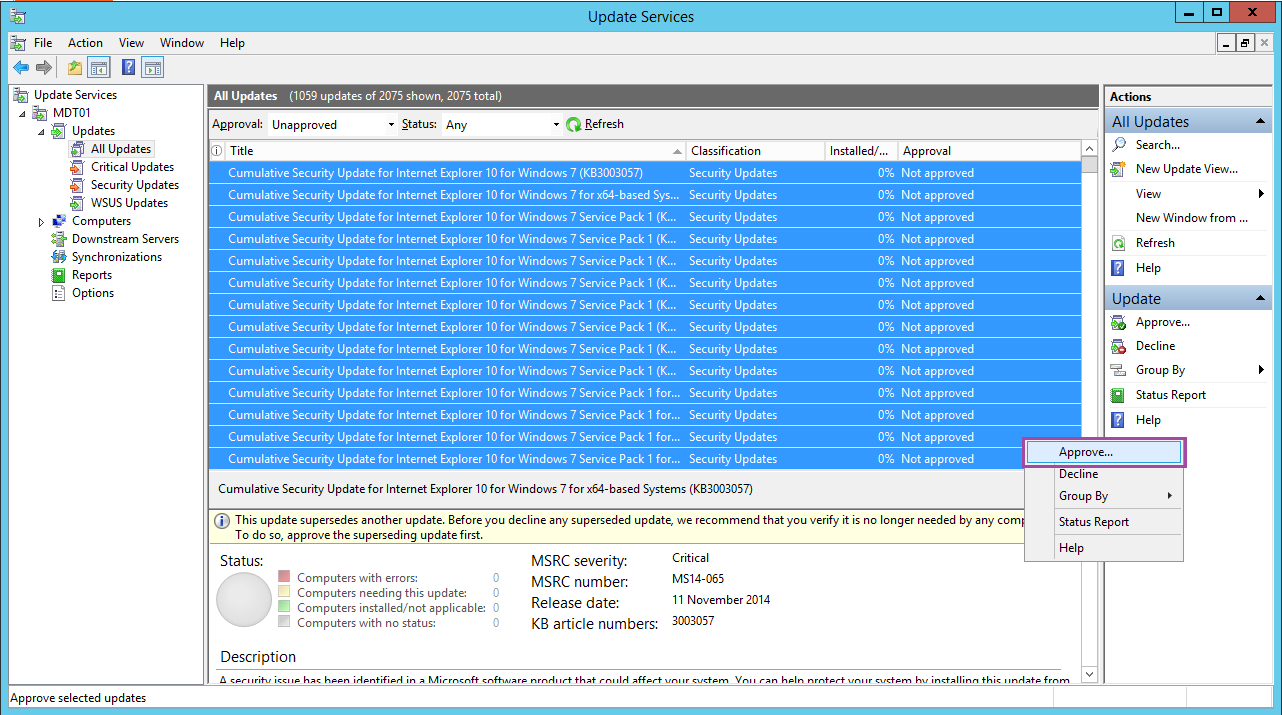
Select all the updates, right-click and choose Approve…
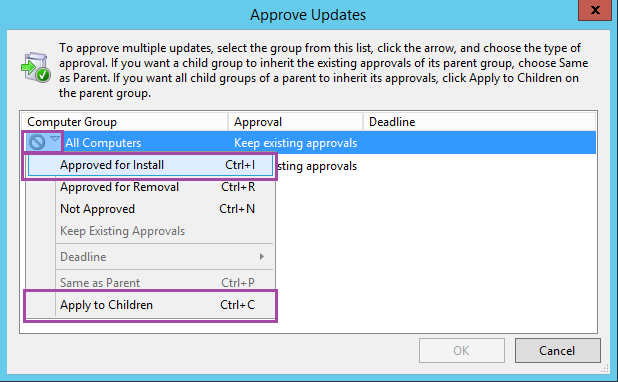
Click the box next to All Computers and choose Approved for Install. Click the same box again and choose Apply to Children.
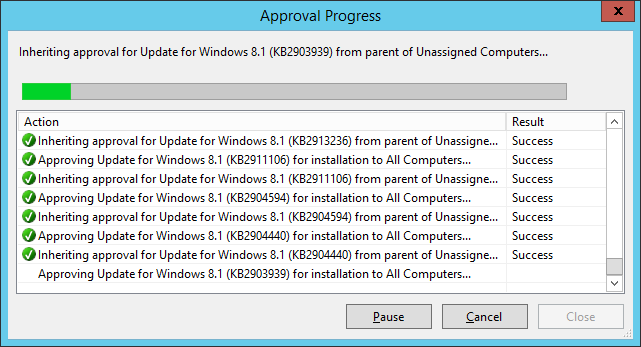
Click OK and wait for all the updates to be approved.
Conclusion
The installation of MDT and supporting software is now complete. Next we will begin the process of configuring the Deployment Share.
MDT2013 Series:
01 Intro and Active Directory Setup
02 MDT Software Installation
03 Deployment Share and MDT Database Setup
04 Network Access Permissions
05 Application and OS
06 Creating Build Task Sequence
07 MDT Database
08 WDS and PXE Booting
09 Creating the Gold Image
10 Capturing the Gold Image
11 Creating Deployment Task Sequence
12 Deployment Role and Computer Object
Leave a Reply